Showing posts with label Recipes. Show all posts

Sunday, February 17, 2013

A Side of Sweet Potato Fries with Ketchup

I love ketchup.

It's truly my favorite condiment.  Fries, fried chicken, anything friend actually just doesn't taste as good without ketchup.

Of course, I knew right away that not only would I be giving up French Fries on the Nutrient Dense Challenge, but inadvertently also ketchup. While I'm definitely mourning the loss of those greasy, salty sticks of potato, I was nearly heartbroken about ketchup. 

But then I remembered how delicious sweet potato fries were!  And if I loved sweet potato fries, surely there would be a Paleo-friendly recipe for ketchup!

Thank goodness for Google.

I found this recipe for Simple Ketchup on PaleoDietLifestyle.com.

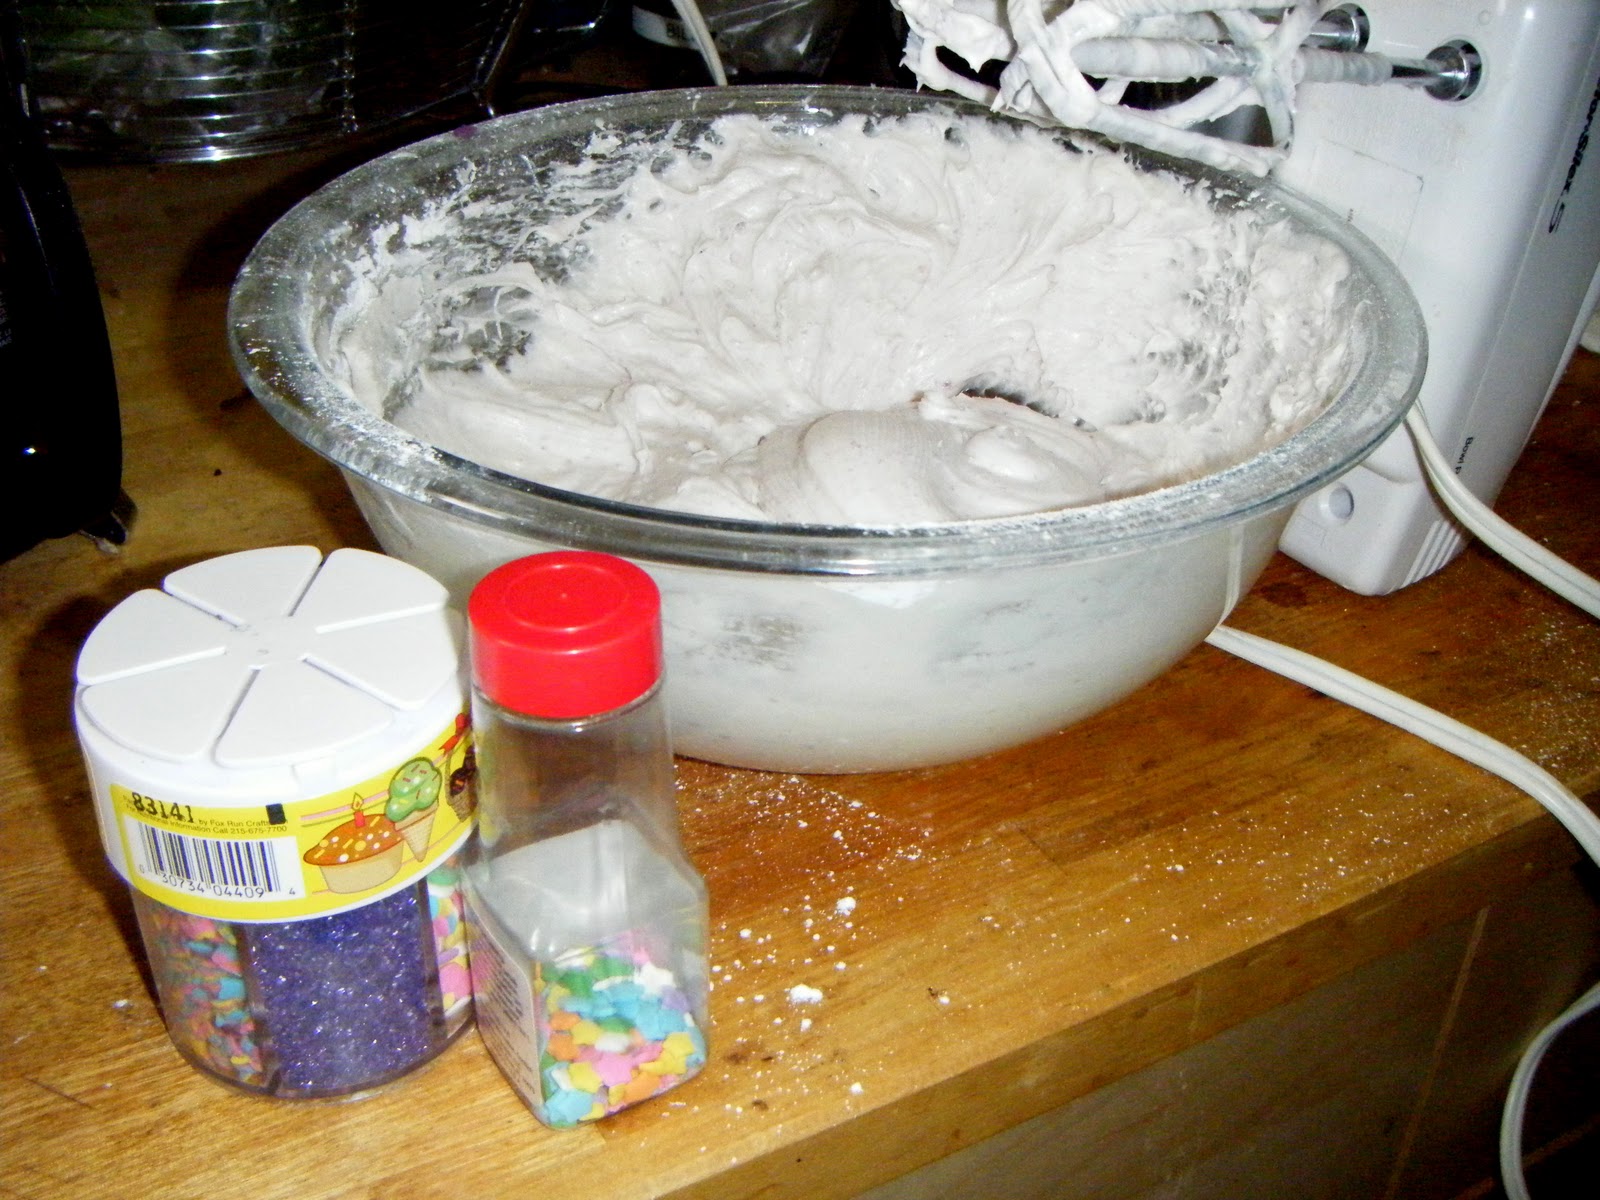
While it calls for using only 1 can of tomato paste, I knew My Man and myself better and quadrupled the recipe.  Now, we have a whole jar of ketchup awaiting consumption.
mmm...ketchup...
Since the Nutrient Dense Challenge and other Paleo resources promote sweet potatoes as a great source of complex carbohydrates, we also decided to give sweet potato fries a try.  While I was a bit hesitant since my complete fail at making sweet potato chips, I let My Man lead the charge on this one.

He decided to go for a Cajun Sweet Potato Fries recipe on Primal-Palate.com.  He also decided to quadruple the recipe, but realized that maybe he shouldn't have quadrupled the chili powder.  Still, they're pretty tasty.
4 Sweet Potatoes Worth of Fries
I have to admit that while there are some things that feel like I'm "depriving" myself of, there are some ridiculously tasty alternatives.  It takes a bit of work on our part, but everything so far has been delicious and healthy. 

In the end, I'm certainly not feeling deprived of anything.  I noticed in this first week that I don't feel as hungry or "snacky" as I usually do, especially when my meals consist of protein, lots of veggies, and a small amount of fat as the guides are all suggesting.  I'm paying more attention to what my body actually needs and not what it wants because I'm stressed or bored.  It feels quite good.

Tuesday, February 12, 2013

Some Successes and Some Burnt Sweet Potatoes

After spending most of last summer and the beginning of our dating relationship at different restaurant tables, My Man and I decided to do a lot more cooking and meal planning as we got settled into ourselves.

I'm lucky that he's so supportive of my efforts with this Nutrient Dense Challenge.  He even reminded me earlier today that I had already been moving to eat this way, but that I just didn't have the guidelines.  But it's great that he's been so helpful about shopping, meal planning, and even putting up with what I'm sure will be multiple cranky sessions.

Today, I decided to make some sweet potato chip treats for the both of us.  After doing a bit of searching around, I found several recipes that I wanted to try: a great all-around simple Extra Virgin Olive Oil (EVOO) and Sea Salt style, a cinnamon style, and a chili lime style.  My only concern with all the different recipes was that none of them seemed to have the same oven temperature or time in the oven.  Well, I figured that if I wanted them to be more crispy, that I should leave it in the oven for the longer range. 

I was wrong.
sweet potato chips
Chili Lime, Cinnamon, EVOO and Sea Salt
A little delicious, a little burnt...
Some came out not crispy at all, some had great crisp but were a little more burnt tasting, and some were straight out burnt.

I'm honestly bummed about it.  But, at least I know that the seasoning choices I made were quite tasty.

With My Man's help, we made a delicious Cottage Pie.  This was the first time I've ever eaten so much cauliflower.  After this meal, I was pretty convinced that the cauliflower was mashed potato, and I'm certain I'll enjoy it as  rice substitute.  The recipe was a combination of the Shepherd's Pie recipes in the Well-Fed cookbook and Elana's Pantry.
Cottage Pie
Cottage Pie with It Starts With Food, Well-Fed Mashed Cauliflower
recipe, and bacon on the Griddler while Cauliflower cooks.
I don't think I've ever had Shepherd's Pie or Cottage Pie before in my life.  This recipe took much longer than we anticipated.  There are multiple steps that need to be prepped before putting it all together.  It definitely help to have two of us.

Day 2 on the Nutrient Dense Challenge has reminded me to be okay with making mistakes and that I don't have to do it alone.

Monday, March 19, 2012

Green Buko Pandan Cupcakes for St. Patrick's Day!

I've been thinking about these for a while.  It was just perfect timing that I was going to a Filipino-American Book Club meeting on St. Patrick's Day.

I realize how cliche it is to have green food-colored items on St. Paddy's Day, but I don't care.  I love the day when everyone gets to wear all this green, the way I wear green almost every day.  Of course, I have to find something festive for this holiday.

Buko pandan is a popular Filipino dessert flavor. Buko is young coconut, and pandan are Screwpine leaves.  Often, the dessert has coconut pieces and green pandan-flavored gelatin.  It might sound strange, but it's quite a sweet dessert.
Pandan
Luckily, having a car has given me much more access to the Filipino market in Quincy, called "Sure Pinoy."  This is where I was able to find the buko pandan flavoring and macapuno strings for the topping.  But I have had buko pandan flavoring in my possession for perhaps 2 years.  I wasn't joking when I said I had been meaning to make something in this flavor for a while.


RECIPE:
Adapted from Mark Bittman's recipe for Golden Layer Cake, from How to Cook Everything.

Yielding 24 Cupcakes:
10 TBS (1 ¼ sticks) unsalted butter, softened, plus some for the pans and the paper
2 cups cake or all-purpose flour, plus some for the pans
1 ¼ cups sugar
4 eggs or 8 yolks
1 tsp vanilla extract or 1 TBS grated or minced orange zest
1 tsp buko pandan extract
2 ½ tsp baking powder
¼ tsp salt
¾ cup milk

Whipped Cream Frosting with Macapuno Strings:
2 cups heavy cream
4 TBS confectioners sugar
Sweet Macapuno Strings

1.       Heat the oven to 350F. For cake: Grease the bottom and sides of two 9-inch or three 8-inch layer cake pans; cover the bottom with a circle of wax or parchment paper, butter the paper, and sift flower over the pans; invert and tap to remove the excess flour. For cupcakes: Place cupcake wrappers in a muffin tin.

2.       Use an electric mixer to cream the butter until smooth, then gradually add the sugar. Beat until light in color and fluffy, 3 or 4 minutes. Beat in the eggs or yolks, one at a time, then the vanilla extract. Add buko pandan extract to the milk (Don't freak at the super bright green color!).  Combine the flour, baking powder, and salt; add to the egg mixture by hand, a little at a time, alternating with the milk. Stir just until smooth.  The cupcakes will not come out super bring green.  If you want it to be more green, just add green food coloring.
Buko pandan extract combid

3.       Turn the batter into the pans and bake until a toothpick inserted into the center of the cakes comes out clean, about 25 minutes. For cupcakes, check them frequently after the first 10 minutes. Let the cake cool in the pan for 5 minutes, then invert onto a rack to finish cooling. 
They're greenish on the inside
4.       For Whipped Cream Frosting: In a chilled bowl, combine the cream & sugar.  Pour a small amount of the juice from the macapuno strings jar into the mixture as well. Using an electric mixer on low speed, beat until slightly thickened, 1-2 minutes. gradually increase the speed to medium-high & continue to beat until the cream holds soft peaks, 2-3 mins.  If you don't have an electric mixer, just use a whisk...it takes a little bit longer, but it totally works...start slow, like you're beating something, making sure lots of air bubble form.  To get faster, hold the whisk as though you're about to start a fire, and keep doing that until you see he soft peaks.

5.       Top the frosting with a couple of macapuno strings.  For extra festiveness, sprinkle with green sprinkles.  Store at room temperature, covered with wax paper, for up to a day or two; use plastic wrap and it will keep for an extra day or so.
Finished product
I ended up having enough batter to make an extra cupcake.  I was happy this worked out since I wanted to make sure I tasted it before feeding it to anyone else.

I was actually quite surprised at how not super green the cupcakes turned out.  It's extremely subtle when you bite into the cupcake.  The flavor is also subtle, but definitely sweet.  I'm glad I opted for the whipped cream frosting, because it just contributed to the flavors without overpowering it.

If I were to use buttercream frosting, I would probably use the buko pandan flavoring instead of vanilla, or perhaps use less vanilla extract.

It was a great experiment with baking!  It was also the first time I've baked in my new apartment.  I haven't felt much motivation to bake, which I'm sure has been a part of my needing to adjust to all the changes.  After this first time, I am definitely now feeling the urge to bake more.

It's a St. Paddy's Day miracle!

Saturday, February 25, 2012

Dia de los Muertos en Febrero

As another part of our school vacation week at the after school program, one of the other group leaders wanted to do a Day of the Dead/Cultural Celebration with her group.  I happened to know of a place to get molds for the sugar skulls, so I helped a bit in the celebration.

Though sugar skulls are mainly decorative and not really edible, we decided to create chocolate molds for the kids to munch on.

Here's some tips when preparing for anything that involves melted chocolate:
  • The best way to melt chocolate is to use a double boiler.  If you don't have a double boiler, place a heat-safe bowl into a pot of boiling water.  The bowl must be slightly bigger than the pot so that the boiling water is barely touching the bottom of the bowl.  The bowl must also be completely dry - the water affects the texture of the chocolate.
  • If you plan on getting fancy and using different colors, you have to use different bowls.
  • As the chocolate melts, continuously stir the chocolate around.  A wooden spoon or a frosting spatula is best, but any spoon can do it as well.
  • Depending on the size and shape of the mold, always have enough chocolate around. When you're with kids, some of that chocolate will disappear before it melts.
  • Be prepared for super hyper kids after they eat the chocolate.
My fave molds are the one with the flowers on the side,
 and the hardcore mustachioed one!

Tuesday, February 21, 2012

Fat Tuesday, Indeed: Mardi Gras Cupcakes, Cake, and Bundt

Perhaps because of the move, I've had a hard time feeling motivated to bake.  When I bake, I like to have everything I need at hand, and I guess I feel like I don't have everything I need yet.

Luckily for me, the kids I work with at the after school really enjoy baking and cooking (probably because it means they get to eat it afterwards).  Though we try to cook random [easy] things here and there, this week is the Boston Public's February vacation week and we had time to plan things out.

Considering that today was Mardi Gras in New Orleans, it seemed appropriate to do something Mardi Gras related.  I had recently learned about the King Cake at a Mardi Gras-themed event, and I thought it would be a cute thing to do with the kids.  Of course, with kids, it's even cuter with cupcakes.

I wish I had an actual delicious recipe at hand, but with kids sometimes the best thing to do is to have an already prepared cake mix.  I also wish I had an actual picture of the ginormous 5lb bag of yellow cake mix that the program happens to use.  It borders on the ridiculous.  Thus, we had a ridiculous amount of cake and cupcakes prepared.  That's 12 cupcakes, 1 8in pan, and 1 bundt cake's worth.
claiming my cupcake
not bad for a 5lb bag of cake mix
The one addition I added to make it relatively close to a King Cake was add a TBS of ground cinnamon.  Naturally, we topped the pastries with yellow, green, and purple sprinkles. 

Of course, I also added the little baby figurine as well.  Though each cake had only 1 baby figurine in it, I made sure that each cupcake had a baby figuring for each of the kids.
uh oh..feet first?
I made sure to stuff the figurine in each cupcake and frost it before they got to sprinkle their own.  I explained to the kids that there was a surprise in each of their cupcakes, so they had to be careful when they reached the center.  I also explained that the baby figurine was a symbol of luck. 

I believe that originally, there was a ring or a bean that was cooked in the cake.  But different variations and different religious connotations mixed in with the lore.  I'm assuming that the baby is related to the coming of Spring/Easter/Baby Jesus or whatever.  But luckily, the children didn't ask beyond the fact that it was considered lucky.

I also thought it would be cool to use the Mardi Gras beads in a different way from how they're usually associated.  The kids would get beads for being on good behavior - following directions, not being too rambunctious.  It worked pretty well, actually.

At the end of the day, the kids were asking about whether they deserved another set of beads, and some of them were holding on to the little baby figurine as well.

The cupcakes and cakes were also quite a hit among kids and staff, and fairly delicious for being a standard cake mix with the addition of cinnamon.
nothing left but crumbs and luck

Saturday, March 19, 2011

Lent Challenge 2011 - That's Right...I Had Pancakes...

I apologize for my title.  Like I've mentioned in my previous post about this Lent Challenge diet, I've got kind of an interesting (read: bitchy) edge.  This was the best title I could think of.

Yeah, I had pancakes for breakfast this morning.  Dairy-free, egg-free pancakes.

When the boyfriend and I last went up to Maine to visit his family, his step-mom made these delicious buckwheat pancakes.  They were so light and fluffy, I felt like I could have eaten a ginormous stack of them.  Then she told us that it was a mix that you just add water to.  Amazing!

Naturally, when I went to brunch last weekend and felt like I wanted to have a tantrum in the middle of the restaurant, I remembered those buckwheat pancakes.

I emailed the boyfriend's step-mom and asked for the recipe, and she told me that it's a mix that isn't really found in stores outside Maine.  But by Wednesday, I received a package from her with the mix!

Who says that step-mom's aren't awesome?

So, this morning, I said, "Take THAT diet!"
Ployes Buckwheat Pancake Mix!
Using our bomb-ass Cuisinart Griddle/Grill
The instructions on the package says that it's 1 cup of the mix to 1 1/3rd cup of water, but I added a little bit less water and they came out pretty fluffy.  I'm sure if I added the full 1 1/3rd cup of water, they would also be delicious and more crêpe-like.

I could live off a crêpe-diet.  Some of you know this already.

I used Earth Balance buttery spread, which is completely vegan, and I squeezed a couple of drops of lemon juice on top of each pancake.  To complete the meal, I added some strawberries.

Perhaps the worst part is that we don't have any REAL maple syrup in the house.  A while back, we were at Costco and opted for the cheaper and larger Log Cabin maple syrup bottles.  It tastes so synthetic compared to real maple syrup, but it's what we have and we're not ones to just throw things away like that.
Nummy nummy nummy in my tummy...
Either way, it was delicious.  Extremely satisfying.  Not just because it was so tasty, but also because I feel like I have one-uped this diet.

Thursday, January 13, 2011

Pancit Bihon

For some reason, this recipe feels like it will take a whole day of cooking to prepare it.  But, it's really just because there are multiple preparatory steps before it all comes together.

But, if you time it well, the recipe takes less time than you think it would.

I made pancit bihon for New Years, and there was enough of it to last the boyfriend and me several days of meals.  Pancit is basically a Filipino noodle dish and, similar to adobo and sinigang, can be made in a variety of different ways.

This recipe was one that I acquired from my mother.  Being that I spent the holidays away from my family, I definitely needed to have some Filipino food to make up for it.

I was very pleased to know that the ingredients to make pancit aren't too difficult to get, though many of the ingredients I already had at home.

Ingredient List
Pancit Bihon noodles (can be found in Super 88 in the noodle section)
1lb Chicken (boneless and skinless) OR 1 box of Firm Tofu
2 boxes of Chicken Broth OR Veggie Broth
2 bags of Veggie Stir-fry (I suggest just going to Trader Joe's and getting their frozen bag of veggie stir-fry. I ended up getting a bag of frozen veggies + a bag of frozen edamame from Whole Foods this time around.)
1 bulb Garlic
2 Onions
Canola Oil or Olive Oil
Ground Pepper
Paprika
Soy Sauce
Green Onion
Lemons

Initial Prep
1. Cut 1 bag of noodles in half, and place them in a pot of water to soften.  Do not turn the heat on!  This procedure makes the noodles soft and easier to work with.
You can also get a brand called "Excellent," with a picture of a shrimp on it.
That's the brand my mom recommends.
2. Boil chicken.  When chicken is boiled, shred the chicken (you can just use your fingers or a fork) and put aside.  OR Fry tofu in a 1/2 cup of canola oil and put aside.
3. Mince garlic and saute.  Once all the garlic has browned, set it aside.
Browned Garlic and Shredded Chicken
Veggie Prep
1.  Cut and chop onions.  Saute them in a wok with a 1/2 tbsp of oil.
2.  Add the stir-fry veggies when the onions are coated in oil.  You can use all 2 bags or just 1 1/2 bags depending on how large your container is.
3.  Add 1ts of ground pepper, and 1/2ts of paprika.
4.  When the liquid has mostly evaporated and veggies are drying, add 2tbs of chicken or veggie broth.
5.  After most of the broth has been absorbed, set the veggies aside.
Sauteing Veggies
Noodles
1.  In the same wok you used to cook the veggies, put in 1 box + 1 cup of broth, 3/4 cup of soy sauce, 2tbs oil, 2ts ground pepper, 1/2ts paprika.
2.  When the mixture starts to boil, put in the softened noodles.  Mix to coat all the noodles.
Almost done!
3.  When the noodles have almost absorbed the liquid mixture, throw in 1/2 of the sauteed veggies.  Saute the mixture.
4.  When all the liquid has been absorbed by the noodles, it's done!

Finishing Touches
1.  Place the noodles in a serving dish (probably a large tray of some sort).
2.  Put the remaining veggies on top of the noodles.
3.  Then place the chicken or tofu on top of the veggies.
4.  Then put the browned garlic on top of the chicken.
5.  Then sprinkle chopped green onions all over the dish.
6.  Finally, chop lemons in halves, then quarters.  Put the quarters on the sides of the dish.
Voila!
To serve this dish, you want a nice large scoop of everything.  I highly recommend squeezing some lemon on the noodles before feasting.

Altogether, the preparation and cooking probably took me about an hour and a half, which is pretty fast compared to what it looks like.

Also, while it's delicious fresh from the kitchen, I think it's also quite delicious the next day after being in the fridge.  You can reheat it, but it's also delicious as a cold meal.

Personally, I could eat a ginormous bowl of this stuff!  It's one of the highlights of Filipino get-together's.

Monday, November 8, 2010

Cookie Simplicity from My Teen Years

As long as I've made cookies, I've used this cookie recipe that my best friend and I used back in high school.  I don't remember where the recipe came from, but I feel like it was a book she checked out from the LA Public Library.

I've copied the recipe into my personal recipe book, which I've carried with me to all my residences.

These cookies were perhaps my first real venture into baking.  Through this recipe, I learned how to double and triple recipes (since this one only makes about 12 cookies).  Through this recipe, I really learned to appreciate the pleasure of making cookie dough balls.

I recently found some dark chocolate and mint chips and excitedly bought 4 bags.  Though I initially wanted to use them only for brownies, I realized there would be no better way to introduce them into our household than with cookies.
Perhaps a seasonal item, 'tis the season indeed.

With the Boston days getting colder and darker, I really start to get homesick.  Now, don't get me wrong.  I really actually enjoy the autumn here.  That crisp air is like no other, and it just makes you feel alive as you breath it in.  But it also makes me miss my family and friends.

These cookies are almost the embodiment of that feeling.
Nums...
The mix of the old and the new.  Homesickness while walking through a sidewalk filled with crunchy leaves, my scarf wrapped around my neck that stretches to take in any bit of sun.  The tingly fresh air and the comforts of home.

I definitely needed these cookies this week.

Friday, November 5, 2010

Adobo - Filipino Style

One of the first meals that I learned how to cook when I had access to my own kitchen was chicken adobo.  Though, when most people hear "adobo," they assume it's the Spanish version.  But, while we might have adopted the name from the Spaniards and the base is similar in that there is a marinade,  it's really its own beast.

Filipino-style Adobo is really a very simple concoction, but it is truly individualistic.  While it can be considered the "national dish" of the Philippines, every household cooks it differently.

In essence, Filipino Adobo is anything marinaded in a vinegar based marinade.  Anything else that is added to the marinade is purely representative of the region the cook or their family is from.

My family cooks it in a relatively popular way:  add soy sauce, black pepper, and garlic.
All you need...
Obviously, if you prefer something other than chicken, like pork or beef or fish or shrimp, you can easily adopt the adobo recipe to it.  That's just part of its beauty.

Recipe:
2lbs of Chicken (Personally, I think that bone-in tastes a lot better since it really holds in the flavors, but boneless is also delicious and will cook faster.)
2/3 cup of Vinegar (If you can find cane vinegar in your Asian market, you're quite the lucky duck!  This is Filipino vinegar, and it's just got a great twang to it.)
1 cup of Soy Sauce (Any soy sauce will do)
1 tsp of Ground Black Pepper
1/2 a bulb of Garlic...or if you're like the boyfriend and me, the entire bulb!

Additional ingredients added to your liking:
Juice of 1 Lemon
3 or 4 Bay Leaves

Instructions:
Mix all the ingredients together and marinade the chicken while you prep other things.  You should definitely start your rice at this point, and prep any veggies you might want to add to your meal.  I suggest broccoli and baby carrots to add to the rice, but I'll get to that later.

Heat up a pan or a skillet, and put about 2 tablespoons of cooking oil on the pan.  When it's heated, place the chicken and marinade in the pan.  Make sure to turn the chicken around to ensure that it cooks on all sides and all the way through.  Boil the chicken in the sauces until it is somewhat dry and the chicken is cooked thoroughly.

Set the chicken aside.  While the heat is still on and there is still some sauce in the pan, throw in your veggies.  Hopefully, your rice is done cooking at this point, and you can throw in your rice as well.  This will really help to mop up the rest of the sauce and garlic bits.  Fry the rice and veggies until the rice is fairly covered in the sauce and the veggies are somewhat soft.

And there you have it, ladies and gentlemen.  You've now made chicken adobo.  I wish I had pictures of my completed meal to show you.  Alas, I got way too excited and ate it before I got to take a picture.  However, I do have the nutritional value.

Nutrition Facts (Chicken Adobo Only)

Recipe Serves 4 people
Amount per Serving - 2 medium to large pieces of chicken
  • Calories 444
  • Calories from Fat 63

Not so bad for a full meal.  It's fairly healthy when you add the veggies to it, and it's chock full of protein.

But really, the reason you should be having this meal is because someone Filipino has invited you into their home, and wants you to learn more about their culture by feeding you this dish.  You are one lucky son of a gun.

Monday, August 30, 2010

CSA Adventures: Making Sushi

This has been our second year participating in the CSA farmshares, and we've received so many delicious veggies and fruits.  Though we've done a lot of stir frying, juicing, and salad making, I'm very proud of two uses of veggies in our household.  Specifically, I'm proud of two uses of our vast supplies of cucumbers.

The first one I'm excited to share is our adventures in making sushi!

I'm going to give the boyfriend credit for the sushi adventure, since he suggested it as a birthday celebration for him and two other Virgos.  Really, it was quite genius.

We ran into a slight obstacle that was easily solved, though we weren't necessarily sure of the success right away.

When you're preparing to make sushi, one of the most important things is to make sure you have good quality fish.  The first place we thought of was Whole Foods, but good quality fish also equals extremely expensive fish.  Luckily, the boyfriend and I have tried making sushi at home before, and we learned that our local Shaw's Market had pretty decent fish for much cheaper.  So, we went for the market fish once again.

There were 5 of us that were going to partake in sushi action, so I figured a pound of salmon and a pound of tuna would be good for us.  Well, it was definitely much more than enough!

Here's a list of all the items that we used to make sushi:
Glutinous Rice - We initially made about 4 cups of the rice, and then made another 6 cups after the first 4 cups were used.  However, we probably should have just made 6 cups of rice from the beginning, and we would have been fine.  At the end of it all, we were thoroughly stuffed and maybe used half of the 6 cups in the second batch.  Tip: The rice gets really sticky, and you want to make sure the rice cools close to room temperature before using it.

Rice Vinegar - Rice vinegar is really the best option for sushi rice.  After the rice is done cooking, you want to scoop it into another bowl, sprinkling rice vinegar on it for taste.  You can also used diluted rice vinegar (with water) to help the nori stay put after rolling a sushi, to wipe a sticky knife with, and to get rice off your fingers.
Marukan Rice Vinegar and Thai Glutinous Rice
Nori (Dried Seaweed Sheets) - I bought about 4 packs of 10 sheets.  We ended up using about one and a half of the packs altogether (including a couple of sheets that were snacked on).  The packs that I got were great mainly because of the tutorials on the back of the package on how to roll sushi and how to make the glutinous rice.

Wasabi - Truth be told, I'm not too keen on so much wasabi.  I don't add it to my soy sauce at all.  I think for me, the wasabi is too overpowering over the rest of the deliciousness.  But, alas, it is a sushi staple.

Soy Sauce - Another obvious sushi staple.

Spicy Mayo - It was super exciting to make some of this from scratch!  I had no idea what the ingredients were, but it's just so deceivingly simple!  Basically, you take some mayonnaise and some Sriracha and mix!  Add however much you would like and to taste. 

Cream Cheese - Apparently, according to the boyfriend who lived in Japan for 6 years, adding cream cheese to sushi is a mainly American creation.  Personally, I seek out any of those sushi rolls with cream cheese.  It's delicious with salmon.

Capers - This is probably never done anywhere!  One of the first rolls I made was with salmon, cream cheese, and capers.  It was like a Jewish sushi roll.  And it was delicious!

Avocado - Avocado is another item that I seek out when in a sushi restaurant.  This is definitely a delicious addition to any roll.

Chives - I don't know if I've ever had chives in a sushi roll, but this was an item that one of our friends brought to the table (pun intended!).  It adds a great flavor to any roll you could make.

Carrots - I think that carrots help to add a crunchy feeling to the sushi.  Again, this ingredient can be added to any sushi roll.

Cucumbers - The boyfriend loves cucumber rolls, simple and a perfect cooling roll for hot weather.
Ingredients!
Makisu (Bamboo Rolling Mat) - This object is a very important tool in making sushi, perhaps only second important to really good knives.  The mat just helps to ensure that the sushi is tightly rolled, and it prevents your sticky fingers from continuing to stick to the nori.

Tamago - This is another favorite sushi ingredient.  The boyfriend usually likes saving the tamago rolls for the end, since they're sweet.  Tamago translates to egg in Japanese, and it's basically an omelet.  To make tamago, you mix 4 eggs, 1 tbsp of sugar, 1 tsp of mirin (we used sweet wine and just added a bit more sugar, which was a great substitute), and 1/2 tsp of soy sauce.  You can cook flat it in a pan, and if you want to flip it to make it cook evenly, then you can slide the omelet onto a plate and use the plate to flip it over to the other side.  At least, this is the strategy I use since I lack fancy flipping skillz.  You can fold the cooked tamago to make a nice thick layer of deliciousness over rice.
Tamago!
Shrimp - How could we not have shrimpy sushi rolls?  I believe some shrimp was added to a tuna roll at one point in the evening.  But shrimp with any of the other veggies is just so good.  Perhaps next time we will take it up a notch and make shrimp tempura to put in our rolls.

Tuna - A nice steak of tuna should be somewhat purple-ish/pink-ish, with a lighter pink in the middle.  Spicy mayo and tuna is really a great roll, so we had several combinations of this.

Salmon - Salmon rolls are tops!  The fish butcher (umm...is that the correct technical term for them?) gave me slightly more than a pound, and we only had to cut off the skin.  Salmon with avocado is a tasty option, and if you add some cream cheese..well, you just can't go wrong.
See food?  Why, yes!
As there were 5 of us, we each took turns making a roll and then cut them into 5 sections.  By the end of the evening, including the fact that we made a bigger batch of rice the second time around, we were stuffed.

Usually, I feel like I could just keep eating sushi forever.  I didn't even count how many rolls I ended up ingesting, but I can tell you that I felt like I was pregnant with sushi on our way home.

Two pounds of fish plus shrimp was definitely much too much for the 5 of us.  Perhaps if we had around 10 people, the amount would have been perfect.  The boyfriend and I ended up packing up the leftover fish and sliced veggies to plan to make sushi again.
Sushi success!
This morning, as we awoke to find that none of us had any food poisoning mishaps, we are proud to say that this session of sushi making was a success.  We definitely would love to do it again.  Interestingly enough, the boyfriend and I are psyched to make more sushi for dinner this evening!

Wednesday, June 23, 2010

Turon - Filipino Banana Roll

Summer is upon us!  It's time to have fresh fruits and veggies, plug in the AC, and perhaps have a nice sangria to help keep you feeling refreshed.

With the heat and humidity that's part of the Boston summer, the boyfriend and I constantly have an issue with ingesting all the bananas before they start getting too ripe.  They go in our cereal or as a snack during the day.  But for some reason, there's always a couple of them left near the end that are just about to hit the point of no return.

While you can definitely make some really good banana bread, I wanted to share a Filipino recipe.

Turon is basically like an egg roll, but filled simply with banana or plantain and jackfruit, dipped in brown sugar.

What is jackfruit, you ask?  Well, aside from being the national fruit of Bangladesh, it's a sweet fruit that grows mainly in South and Southeast Asia.  It looks like this:
Jackfruit on the Tree
In the Philippines, the jackfruit is called langka.  The meat of the fruit is yellow and wraps around it's seeds.  It's probably not something you'd ever think of trying right off the bat.  And it's name sounds like you could use it as an insult.  But I cannot stress enough how the jackfruit DOES NOT taste or smell like durian.

So, onto the recipe!

Ingredients for 20 rolls:
  • Jackfruit (can be bought in Asian markets, such as Super 88 here in Boston, in a jar)
  • 5 Bananas (sliced in quarters)
  • 20 Spring Roll Wrappers (can be bought in any Asian market.  If you find ones that are specifically for lumpia you're doing pretty well!  You can use the square shaped ones or the circular ones, but I prefer the circular ones)
  •  1/2 cup of Brown Sugar or more as needed

Prepping
Instructions:
I recommend taking the spring roll wrappers out of the freezer (where they belong) about a half our before you start to prep.  This will prevent them from getting too stuck to each other.  I also recommend using them within a couple of weeks of buying them, only because they seem to get a bit more brittle as time goes on.

After cutting the bananas lengthwise, you can roll them in some brown sugar, though this is not necessary.

Place banana piece and small piece of jackfruit into folded out spring roll wrapper, about 1/4 from the bottom.  You can take a piece of jackfruit out of the jar and rip pieces of the fruit off, especially since a little goes a long way.  It gets a little messy, but it's delicious messy.
Nummy num nums
Start rolling, folding sides into the middle (if you've ever watched someone make a wrap or a burrito, it's similar to that).  To secure roll, use jackfruit juice or water.  You can then also roll the roll in the brown sugar, or you can sprinkle some on prior to frying.  If you don't want it to be too sweet, I would opt for either dipping the banana or the completed roll, but not both.  I will personally recommend dipping the completed roll, only because it gets caramelized in the process.
Waiting to be fried
Grab your wok or a frying pan with higher sides, and fill it with enough canola oil to have the rolls floating somewhat.  Fry away!
Fry, my pretties!
I usually spin them in the oil so that all of it is coated, but then I let it fry on one side for a couple of minutes.  Make sure you're able to keep watch over them, because you don't want them to get too fried.  When you start to see the bottom side browning, flip it over.  Be careful, and watch for oil splattering!  It's not a fun thing to learn about.

When they're done, prop them up in a bowl lined with a paper towel to absorb excess oil.  Let them cool for about a half hour.  Then enjoy, perhaps with a scoop of ice cream after you've enjoyed one on its own.
Yay! Turon!

Nutrition Facts:

Amount per Serving of 20 people
Calories
56
Calories from Fat 9

Friday, April 23, 2010

Ube Cupcakes! Happy Birthday to Me!

In honor of my birthday, I'm baking one of my favorite Filipino deserts in cupcake form and sharing the recipe with you all!
nom nom nom

Ube is a purple yam that is used in many desert items in the Philippines.  But my favorite form is ube cake.

I loved bringing this cake to large gatherings of non-Filipinos.  It was enough to weird people out, but not weird enough that they wouldn't enjoy every bite of it.

Though it looks like it should be saccharine sweet, it's not as bad as one might think.  The one drawback to the cakes we buy in Filipino bakeries like Goldilocks or Red Ribbon is that they are usually BRIGHT purple due to the addition of food coloring.  Granted, ube is purple enough on its own, but you can tell that there's extra tint added.

I'd also like to add that another drawback is the fact that there isn't a Filipino bakery in Boston.  Nonetheless, I wasn't going to let it stop me from enjoying this treat.

I had to do a bit of looking around on the interwebs for a perfect recipe.  I've made this in cupcake form before, but I'd have to say that I'm pretty proud of it this time around.

I took advice from Burnt Lumpia's blog, which features a lot of great Filipino recipes.  But the main cupcake recipe I used was from Mark Bittman's Golden Layer Cake recipe in How to Cook Everything.

Ube Cupcakes with Cream Cheese Frosting
Ingredients:
  • 1 cup Purple Yam, Ube
  • 1 cup Whole Milk
  • 1 tsp Pure Tahitian Vanilla Extract
  • 18 tbsp Butter (10 tbsp for cake, 8 tbsp for frosting)
  • 1 1/4 cups Sugar - Raw Turbinado
  • 4 eggs
  • 2 cups Cake Flour
  • 2 1/2 tsp Baking Powder Aluminum Free
  • 1/4 tsp Salt
  • 8 oz Philadelphia Cream Cheese
  • 2 cups Confectioners Sugar Powdered
Prep:
Defrost frozen Ube.  Frozen ube can be found in Filipino markets and some Asian groceries.
Take butter and cream cheese out to make them room temperature.
Preheat oven to 350F.
Place cupcake papers in muffin tins.
Prepping
Cupcake:  
Mix ube (once defrosted, you can scrape ube into measuring cup with a fork), milk, and vanilla extract.  Set aside.
Cream 10 tbsp of butter until smooth, then gradually add the sugar.  Beat until light for about 3 or 4 minutes.  Beat in the eggs one at a time.
Combine the flour, baking powder, and salt.
Mixtures ready to be mixed!
Add to butter/sugar/egg mixture by hand, a little at a time, alternating with the milk/ube mixture.  Stir until smooth.  The mixture should be light purple, but not overwhelmingly so.
Scoop matter into muffin tins lined with cupcake papers, using an ice cream scoop for help.
Bake for 20-25 minutes.
Mmmm....ube cake batter...
Frosting:  Mix cream cheese and butter until creamy.  Add one cup of powdered sugar at a time.  Feel free to add some sprinklings of shredded ube to make the frosting purple.
Frosting and sprinkles!
Frost cupcakes after 30 minutes of cooling.
Ta da!
Nutrition Facts
Serving Size: 1 cupcakes

Amount per Serving
Calories 253
Calories from Fat 109.1
(According to livestrong.com and my input of the recipe)

What's interesting is that I feel like I should put them in the fridge, but most resources and my trusty sister-baker says not to.  So, I just keep them in my handy cupcake transporter until consumption. :)
Cupcake transportation at it's best!
So, I'm glad that I can share this with you all!  I'm excited to be out of my 27th year, as you readers can see it's been a difficult one.  But I'm also excited to be a little bit older and, I hope, a little bit wiser.

Here's to making 28 an awesome year!
Hooray for 28!
Related Posts Plugin for WordPress, Blogger...